How to Build a ClickUp Client Portal (With a Real Example)

Every client message that starts with “quick question, where are we on…” is a small tax on your team.
Answer enough of those per week and the tax gets expensive. Account managers burn hours exporting reports, pasting links, and writing status emails. Margins shrink. And ironically, clients still feel out of the loop, because the updates live in their inbox instead of one place they can check anytime.
The fix is a client portal: one link you send your client where everything they need is already there, updating itself.
ClickUp can absolutely do this. It just doesn’t hand it to you as a single feature, so in this article I’ll walk you through exactly how we build client portals in ClickUp, using a concrete example you can copy.
Quick credibility note before we start: ZenPilot is ClickUp’s first and highest-rated Solutions Partner. We’ve implemented ClickUp for 3,100+ clients since 2013, and client-facing visibility comes up in nearly every one of those engagements. What follows is the setup we actually deploy, not theory.
What Is a ClickUp Client Portal?
A ClickUp client portal is a shared view, dashboard, or public doc that gives your clients scoped visibility into their projects, so they can see progress, deliverables, and reports without seeing your internal work.
That word “scoped” is the whole game. Clients should see enough to trust you and nothing that makes them micromanage you. Get the scope right and a portal does real work for your business:
- One source of truth - key info, documents, and reports live in one place instead of scattered across email threads
- Automatic updates - views and dashboards populate with live data, so nobody manually exports anything
- Fewer status calls - clients self-serve the answer to “where are we on this?”
- Stronger relationships - real-time visibility into work demonstrates productivity better than any recap email
- A sales asset - showing prospects the portal their future account gets is a genuinely effective close
Before we build one, you need to pick your sharing method, because ClickUp gives you three and they have very different privacy trade-offs.
3 Ways to Give Clients Visibility in ClickUp
Which method you pick comes down to two questions: does your client need to talk to you inside ClickUp, and how much of your internal kitchen are you comfortable showing them?
1. Shared Client List (Client Joins as a Guest)
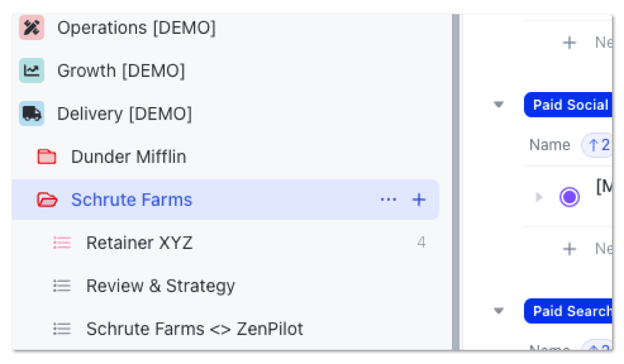
You can create a list in ClickUp and share it with clients by adding them as guests. They see all views, tasks, and documents in that list, and they can comment and collaborate directly in your workspace.
That’s the upside: two-way communication where the work happens. The risk is over-sharing. Unless you’re careful about what lives in that list, your client gets a front-row seat to your internal processes, estimates, and back-and-forth. You’ll either use ClickUp’s Tasks in Multiple Lists feature to surface only client-facing tasks there, or maintain separate client-facing tasks alongside the real work, and both take ongoing discipline.
There are a lot of permission details to get right with this method. If you want an expert to pressure-test your setup, book a call with our team.
2. ClickUp Client Dashboard (Also Requires a Guest Seat)
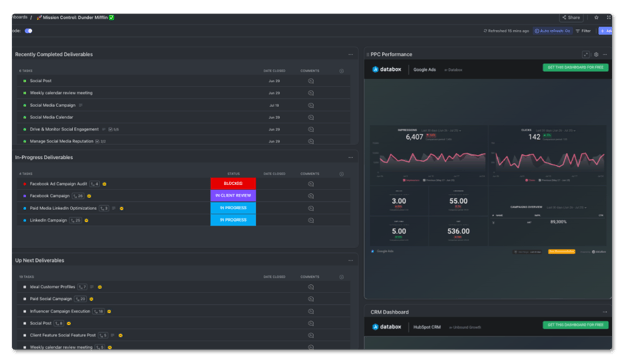
You can also build a ClickUp dashboard and invite clients as guests to view it. Dashboards are the most polished-looking option: you can embed views, forms, and docs, and add charts showing time tracked, completed projects, and other reporting.
Two catches you should know before you build one. First, dashboards can’t be made public the way views can, so your client must hold a guest seat in your workspace to see it. Second, if you add a Task List card, your client must also have access to the underlying tasks to see any data. One workaround: create a public view and embed that in the dashboard instead.
3. Public Portal Doc with Embedded Views (No Guest Seat Needed)
The third option, and the one I’ll walk through below, is a public ClickUp doc with public views embedded inside it.
This is my default recommendation for most teams. Your client doesn’t need a guest seat at all, which means zero worry about them wandering into your internal processes. You control exactly what appears in the portal, and everything in it updates automatically.
The trade-off is communication: a public doc is read-only for your client, so conversations still happen in email, Slack, or meetings. Plenty of teams run a hybrid, a public portal for visibility plus a shared list for active collaboration, and that combination covers most situations well.
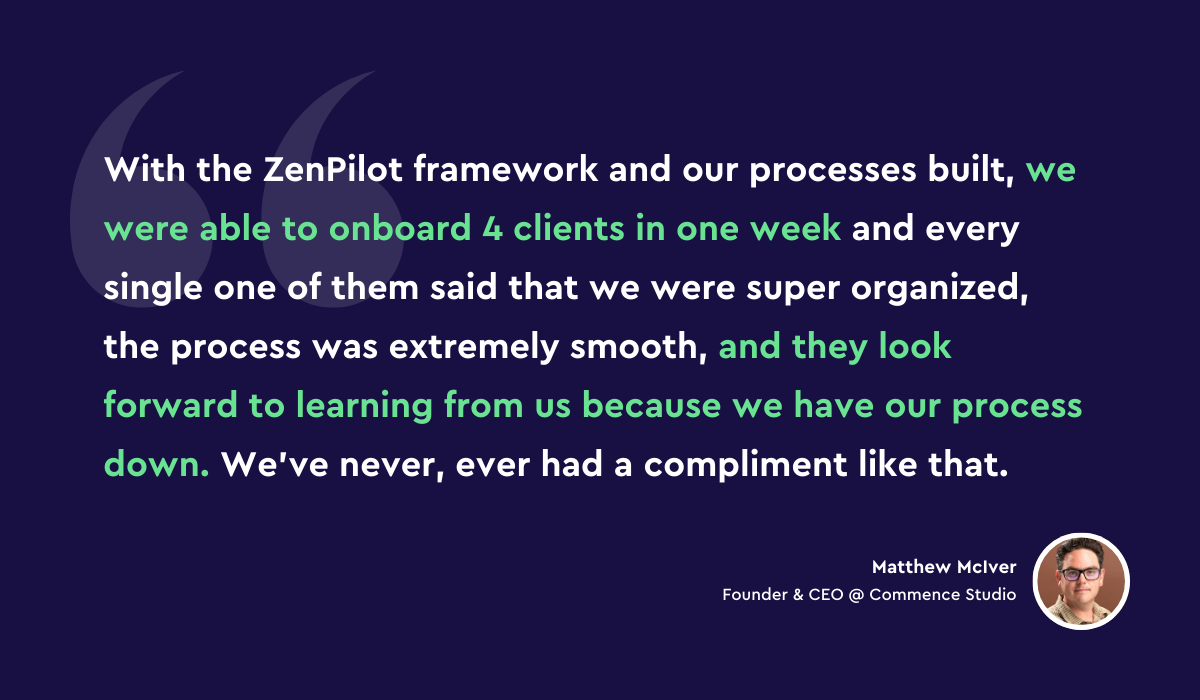
For inspiration on what great client service looks like on top of this foundation, read how Matt McIver and Commence Studio used the ZenPilot system to delight their clients. Read Matt’s story here.
What to Share, What to Hide
Before the build steps, get clear on scope. After implementing ClickUp for 3,100+ clients, here’s where we draw the line.
Share with clients:
- Active deliverables with names, due dates, and statuses
- Completed work (this is your ongoing proof of value)
- Meeting notes and agendas
- Results reporting tied to the work
- Links to the tools you share: booking pages, request forms, shared drives
Keep internal:
- Subtasks and the nitty-gritty of how the sausage gets made
- Internal comments, estimates, and time entries
- Your team’s working lists, SOPs, and anything about other clients
The permissions mechanics matter here. When you share a view publicly, filter it hard: only client-facing tasks, only the fields they need. And use a Table view specifically, because Table views hide subtasks from viewers. A List view might look nicer, but there’s currently no way to stop viewers from expanding subtasks in one, and subtasks are where your internal detail lives.
Download the Complete ClickUp for Agencies Guide
The 47-page guide includes graphics, checklists, and links to how-to videos so you can actionize your ClickUp plan.
Get Instant Access →ClickUp Client Portal Example: The Full Walkthrough
Let’s build one. Say your client is Acme Co., a retainer client with a couple of active projects. Here’s the exact portal we’d stand up for them, start to finish.
Step 1: Set Up the Right ClickUp Hierarchy
The portal is only as good as the structure feeding it. Acme gets their own folder, and every list where Acme work is managed lives inside it. That single decision is what makes “show the client all their deliverables in one place” possible later.
Related: The Best ClickUp Hierarchy for Agencies
Step 2: Create Tasks for All Client Work
Inside the Acme folder, create the lists that host their work. For most agencies that’s a Retainer list for ongoing work, a Review & Strategy list for meetings and account management, and a list per one-off project. Some teams organize by service line instead, which has a nice side effect: you can see which service lines are most and least profitable.
Once the structure is set, load in all active and upcoming tasks with clear statuses like Open, In Progress, and In Review. These statuses feed the views we’re about to embed, so sloppy statuses mean a sloppy portal.
Related: How to Implement ClickUp for Agencies
Step 3: Create the Portal Document
In the Acme folder, create a blank ClickUp doc named “Acme Co. Portal”. Add a cover image for branding if you like.
Write a short welcome message explaining what the portal is and how often to check it. Want bonus points? Record a quick Loom welcoming the client to their portal. It lands every time.
Staring at a blank page? ClickUp Brain can draft that intro copy for you - our complete ClickUp AI guide covers how to put it to work.
Add a sticky table of contents so navigation is effortless, and once you’ve built one portal you’re happy with, save it as a Doc template so every future client portal starts 80% done.
Related: Supercharge Your Workflow with ClickUp Docs
Step 4: Add Resource Links
Under the intro, create a “Resources” section with an H2 header. Make it stand out with a banner highlight and an icon, then add buttons linking to the things Acme reaches for most:
- Book a Call - your calendar booking page
- Submit a Request - your work request form
- View Google Drive - the shared file folder
You can embed these directly in the doc instead of linking, but embeds stretch the scroll length fast. Buttons keep the portal skimmable.
Step 5: Embed a Progress Report View
Now the part clients actually care about. Create a “Progress Report” section in the doc.
Go to the Acme folder and create a Table view showing Task Name, Due Date, Status, and a Progress bar, filtered to open tasks only. Name it “Acme Deliverable Progress”, share the view publicly, and copy the public link or embed code.
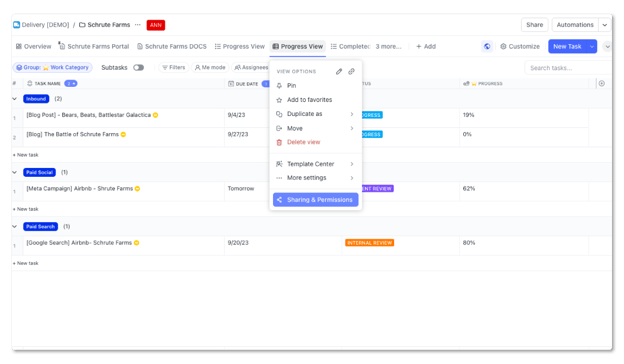
Embed that view in the Progress Report section. Acme now sees real-time progress on every active deliverable, and nobody on your team ever compiles a status update for them again.
Note: use a Table view here, for the reason covered above - it’s the view type that keeps subtasks hidden from your client.
Related: The 8 Views Every Agency Needs in ClickUp
Step 6: Embed a Completed Projects View
Below Progress Report, add a “Completed Projects” section. Same recipe: another public Table view, this time filtered to completed tasks, named “Completed Deliverables”.
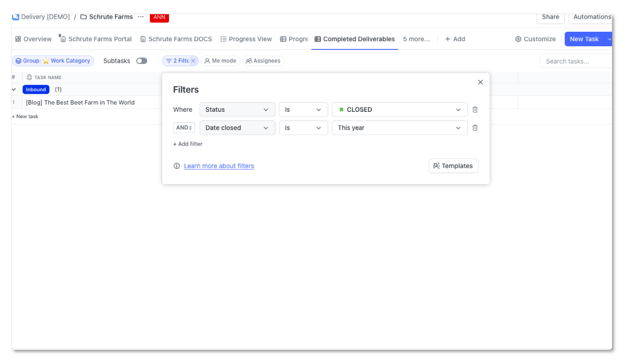
Optionally filter it to the last month, quarter, or year. Either way, this section quietly answers the question every retainer client eventually asks: “what are we actually getting for this?”
Step 7: Embed Analytics Reports
Add a “Results” section and embed reporting from your business intelligence tool: Databox, Looker Studio, Google Analytics, whatever you use.
Progress plus completed work plus results is the sequence that ties your activity to their outcomes. That connection is what portals are really for.
Step 8: Add a Meeting Notes Page
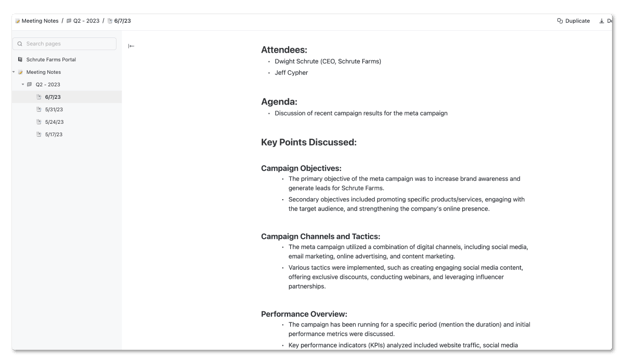
Click +Page to add a second page to the doc called “Meeting Notes”, organized by quarter or year. This documents the whole journey, and it’s a lifesaver when your client’s point of contact changes and the new person asks “so, what’s the history here?”
Step 9: Make the Portal Public and Send One Link
Go to Sharing and Permissions on the doc and generate the public link.
Send it to Acme. That’s the whole handoff: one link, everything they need, updating itself from the same tasks your team already works in.
Customizing Your Client Portal
The example above is the base model. Some upgrades worth considering once it’s live:
- More branding: colors, icons, custom imagery
- Embedded forms, docs, and availability calendars
- Extra pages for strategy docs, QBRs, or team charts
Start simple and let client feedback drive what you add. And when you’ve dialed in a version you love, go one step further than a Doc template: save the portal doc, views, and lists together in a Client Folder Template. New client, one click, portal included. That move alone saves hours per onboarding.
What a ClickUp Client Portal Can’t Do
I’d rather you hear the limits from me than discover them mid-rollout.
No dedicated “client portal” feature - as of 2026, you’re assembling a portal from sharing features: public docs, public views, dashboards, and guest permissions. It works well, but it’s a build, not a toggle.
Read-only public portals - the public doc method gives clients a link, not a login. They can see everything you’ve scoped for them, but they can’t comment or collaborate through it. Two-way collaboration inside ClickUp requires guest seats.
Guest seats required for dashboards - there’s no public-link option for dashboards, and Task List cards only show data if the guest can access the underlying tasks. Plan for that before promising a client a dashboard.
Plan-based guest limits - how many guests you get, and what permissions they can hold, depends on your ClickUp plan. Check ClickUp’s pricing page for current numbers rather than assuming, especially if you’re planning guest access for every client.
Subtask privacy depends on the view - only the Table view keeps subtasks hidden in shared views. Embed a List view by habit and your client can expand into internal details you never meant to share.
None of these are dealbreakers. They’re just the reasons the hybrid approach exists, and the reasons scope decisions come before build steps.
Want a Client Portal Your Team Doesn’t Have to Maintain?
We’ve built client-facing ClickUp setups for 3,100+ clients. Book a free 30-minute call and we’ll map the right sharing model for how your team works.
Book a Free Call →FAQ: ClickUp Client Portals
Does ClickUp have a client portal?
Not as a single built-in feature. ClickUp gives you the ingredients: public docs, publicly shareable views, dashboards, and guest permissions. A client portal in ClickUp is those pieces assembled deliberately, usually as a public doc with filtered public views embedded inside it.
Can clients see ClickUp dashboards?
Yes, but only as guests in your workspace: there’s no public-link option for dashboards. Remember that dashboard cards only display tasks the guest can access, so check permissions before the client does. If you want dashboard-style reporting without buying guest seats, embed public views and BI reports in a public doc instead.
What do guests cost in ClickUp?
Guest seats and their permission options vary by ClickUp plan, and ClickUp adjusts these details from time to time, so check ClickUp’s current pricing before you commit to a guest-based portal for every client. If guest limits are a constraint for you, the public doc method sidesteps them entirely.
Can clients see subtasks in a shared view?
In a Table view, no, and that’s exactly why we use it for portals. Other view types, like List view, let viewers expand subtasks, which usually exposes internal working detail. Filter your shared views to client-facing tasks only and share them as Table views.
What’s the best ClickUp client portal setup for most teams?
A public portal doc per client: welcome message, resource buttons, an embedded Progress Report view, a Completed Deliverables view, embedded results reporting, and a meeting notes page. It requires no guest seats, updates itself, and hands your client one link. Add a shared list on top only for clients who genuinely need to collaborate inside ClickUp.
Want Client Communication That Runs Itself?
A portal is one piece of a bigger system. It only works if your team keeps statuses current, dates accurate, and processes consistent, because the portal broadcasts whatever your workspace contains. Clean workspace, impressive portal. Messy workspace, very visible mess.
That foundation is the work we do at ZenPilot. We’ve built client-facing ClickUp setups for 3,100+ clients, and the portal is usually the easy part once the underlying structure and habits are right.
If you want help designing yours, book a free 30-minute call. We’ll look at how your team runs ClickUp today and show you the fastest path to client visibility that doesn’t cost your team hours a week. Worst case, you leave with a clear picture of what to fix first.